Add API Credentials
Request by sending an email to developer@vatom.com
Build a Sample App with Vite
Vite (vitejs.dev) is a tool Vatom uses to build sample code to demonstrate our SDKs for web apps. This page describes the typical process for starting one of these sample apps. We reference these steps from several places in our documentation for developers.
Start With a Home Page
Let's get started by using Vite to create a React based web app to display a home page. A home page with some text or a splash screen image is sufficient for now.
See v3.vitejs.dev/guide for help getting started.
Sample Terminal Commands
The commands below demonstrate the creation of a TypeScript and React based project
named "my_project" using Vite. You can choose different options.
In the steps that follow, make any necessary adjustments to accommodate your choices.
% yarn create vite
yarn create v1.22.19
warning package.json: No license field
[1/4] 🔍  Resolving packages...
[2/4] 🚚  Fetching packages...
[3/4] 🔗  Linking dependencies...
[4/4] 🔨  Building fresh packages...

success Installed "create-vite@4.0.0" with binaries:
      - create-vite
      - cva
✔ Project name: … my_project
✔ Select a framework: › React
✔ Select a variant: › TypeScript
This first step toward your sample app should now be able to display a default home page. Give it a try on localhost with the following commands or continue with the instructions at v3.vitejs.dev/guide.
% cd my_project
% yarn
% yarn dev
NPM Versus Yarn Commands
This tutorial defaults to yarn where some developers prefer using npm commands.
Either command line tool is fine but it is recommended that you choose one and
stick with it.
Each tool uses intermediate files in a different way and it is
possible for conflicts between them to create confusion.
Add Router Module
Now let's add React Router DOM, an NPM module that provides Client Side Routing, as a dependency to your project:
You can add this dependency with the following yarn command:
% yarn add react-router-domAlternatively, if you are using the npm command instead of yarn you can execute
the following:
% npm i -s react-router-domYou are now set up to use these Client Side Routing in the steps that follow.
Add a Logo
Place an image named "app-logo.png" in an "assets" folder
under the "src" folder of your project. Use your own image or right click on
the following image to download it for your own use.

Add A Folder And Three Files
Create a folder named "pages" within the "src" folder of your project.
Create files named "Home.tsx", "About.tsx", and "Common.css" within the new "pages" folder.
Paste the following sample code into these new files.
Home.tsx
import { Link } from "react-router-dom";
import appLogo from '../assets/app-logo.png';
import './Common.css';
//
const HomePage = () => {
  return (
 		<div className="page_wrap_gp">
			<div className="page_torso_gp">
				<img src={appLogo} alt="app logo" />
			</div>
			<div className="page_nav_footer_gp">
				<div>
					<br/>
					<h1>Welcome to the Home page</h1>
					<Link to="/about"> Click here to go to the About page </Link>
				</div>
			</div>
		</div>
  );
}
//
export default HomePage;
About.tsx
import { Link } from "react-router-dom";
import appLogo from '../assets/app-logo.png';
import './Common.css';
//
const AboutPage = () => {
  return (
 		<div className="page_wrap_gp">
			<div className="page_torso_gp">
				<img src={appLogo} alt="app logo" />
			</div>
			<div className="page_nav_footer_gp">
				<div>
					<br/>
					<h1>Welcome to the About page</h1>
					<Link to="/home"> Return to the Home page </Link>
				</div>
			</div>
		</div>
  );
}
//
export default AboutPage;
Common.css
#root {
  width: 100vw;
  height: 100vh;
  display: flex;
  flex-direction: column;
  text-align: center;
}
/*---*/
.page_torso_gp{
  height: 70vh;
  overflow: hidden;
}
/*---*/
.page_nav_footer_gp{
  overflow: hidden;
}
/*---*/
.text_left{
  float: left;
  width: 50%;
}
/*---*/
.text_right{
  float: right;
  width: 50%;
}
/*---*/
iframe {
  width: 100%;
  height: 100%;
}
Handle New Pages Via Router
On first running the project, the default home page was rendered by the file
"App.tsx" within the "src" folder of your project.
We will edit this file to remove the code that renders the home page
and instead implement a client side router that dispatches to the code in
the "pages" folder for rendering pages.
App.tsx
import { BrowserRouter as Router, Route, Routes } from 'react-router-dom';
import HomePage from './pages/Home';
import AboutPage from './pages/About';
//
function App() {
  return (
    <Router basename={"/" }>
        <Routes>
          <Route path="/" element={<HomePage />}></Route>
          <Route path="/home" element={<HomePage />}></Route>
          <Route path="/about" element={<AboutPage />}></Route>
        </Routes>
    </Router>
  );
}
//
export default App;
NOTE: If the original version of "App.tsx" imported a CSS file, it no longer needs to
do so because it now delegates page rendering to the code in the "pages" folder.
As a result, it is possible to delete files that were previously imported if nothing
else in the project still refers to them.
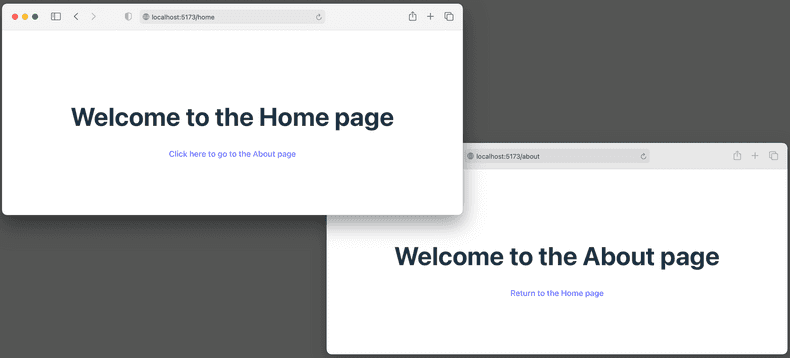
At this point, your web app should be able to display a default home page that includes a link for navigating to a second page. Here is a source code snapshot corresponding to this stage of development in a public repository. This demonstrates the ability to host multiple pages and navigate between them.

Specify Port for Localhost Development Server
Vite bundles your project with a development server that you can use to test your app on localhost. By default, this development server hosts the the web app at http://localhost:5173/ which you can then access from a local browser.
You can override this default by specifying a different port in the vite.config.ts file.
For example, the following configuration file inserts server: { port: 3000 }
to select port 3000 instead of the default.
vite.config.ts
import { defineConfig } from 'vite';
import react from '@vitejs/plugin-react';
//
// Details at https://vitejs.dev/config/
export default defineConfig({
  plugins: [react()],
  server: {
    port: 3000
  }
});
See vitejs.dev/config/ for more details concerning configuration options.